Fanbinding - Tumblr Posts
[Image description: The title, "Fanworks Permission Statement Builder," and black line-drawing-style pictures of a hand holding a pencil and of a microphone with a pop filter, over a background of crumpled paper. End ID.] (credit to @rystonlentil for the image ID)
Hey fanworks creators!
Excited about the idea of someone creating something based on your fan creation (like podfics, fanart, translations, etc)? On the other hand, do you not want people creating stuff based off your fanworks and don't want to have to turn them down? Or do you have a more nuanced idea of what you are and aren't comfortable with people doing based on your fan creations? Don't particularly care one way or the other about what people create based on your stuff?
SPEND JUST A FEW MINUTES TO QUICKLY GENERATE A FANWORKS PERMISSION STATEMENT LETTING PEOPLE KNOW YOUR PREFERENCES!!!
What is a fanworks permission statement?
A fanworks permission statement (also known as a blanket permission statement or transformative works permission statement) is very simple: it's something you post in a publically-visible place (usually your AO3 profile) that tells other fan creators what you are and aren't okay with in terms of other people making fanworks based off your stuff. It can be as simple as a sentence or two, or as complicated as you want to communicate your preferences clearly.
Who should have a permission statement?
A permission statement is for anyone that creates fanworks! Yes, even if you don't think anyone would ever want to create something based off your fanworks. You never know! It's not egotistical to post a permission statement, it's HELPFUL. Yes, even if you don't want people making something based off your works. It means no one has to reach out to ask you, they can know your preferences right away.
Is it only for fanfic writers?
Absolutely not! It's great for fan creators of ALL kinds to have a fanworks permission statement! Fanartists, someone might want to use your fanart as inspiration for a fanfic or create fanart inspired by your work in a different medium! Podficcers, other people creating in an audible medium might want to insert clips of your podfics into their work, or copy the way you did certain effects! Fanbinders, you might inspire an artist with the way you do your binding! This is really for everyone, because fandom is infinitely creative and who knows how another fan creator might be inspired by your work!
What do I even say in a permission statement?
That's exactly why we built the Fanworks Permission Statement Builder! So you don't have to think about what to say or how to say it. Just spend a few minutes answering questions about your preferences that cover many of the common things people might want to specify, and you'll have a permission statement ready to copy-and-paste into your AO3 profile, or to edit to your heart's content!
Why use the Fanworks Permission Statement Builder?
Don't want to come up with a permission statement on your own? Not sure what should even go into a permission statement? Want someone to at least give you a starting place that you can edit to better reflect your preferences? Want someone to just hand you a ready-to-use permission statement that you can paste into your profile? Spend just a few minutes answering some questions about your preferences, and you'll have a permission statement ready to use or edit!
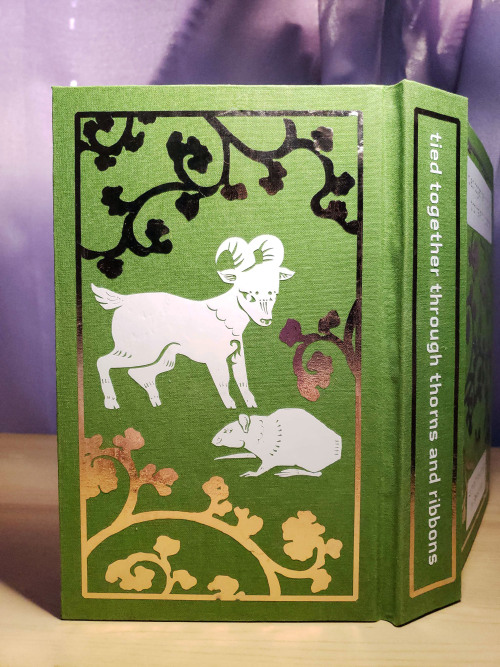
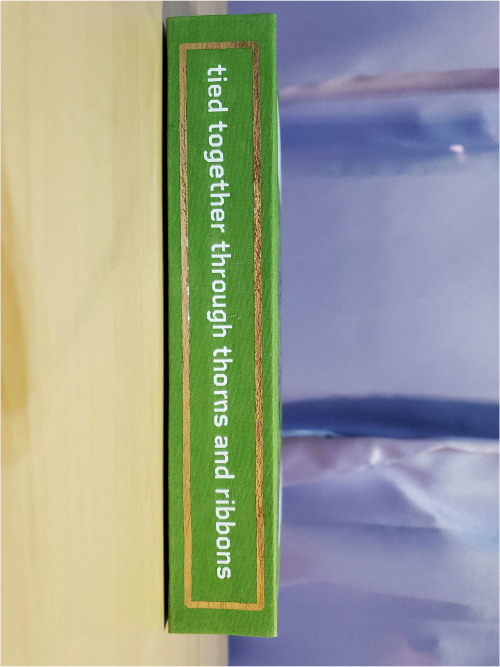


Tied Together Through Thorns and Ribbons by @beastenraged
Thank you so much beastenraged for giving permission for a fanbinding! If anyone wants a fun BaronJitsu fanfic to read, pleeeeeease check this one out! I had a great time reading it while slacking at work lol.
Learned a lot doing this bind. For one, iron-on foil is the devil's material even though I do like how it looks. Probably going to just use it for short titles or something from now on though. Also learned how to sew my own headbands. It's actually not that hard to do, just time consuming. Also tried doing an oxford hollow for the first time, and it's... eh. I haven't really noticed it helping any but it hasn't negatively affected the book opening so *shrug*.
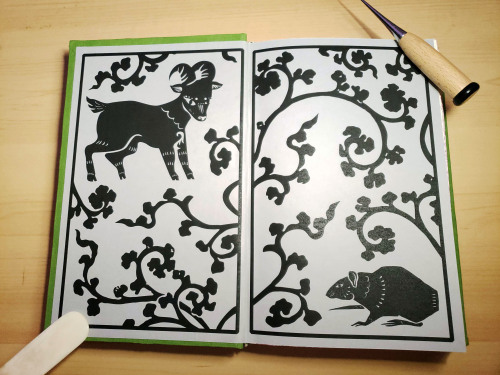
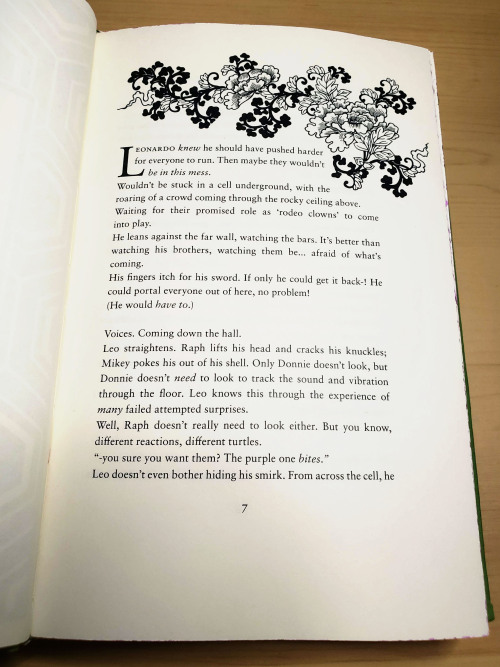
The goat and rat imagery were sourced from rawpixel while the flowers in the chapter header and the vines on the endpaper and cover were ripped from japanese patterns books on archive.org
Want to fanbind? Need davy boards/book boards and low on funds? I have an excellent hack for you:
Repurpose shitty books
"But!!!" You may say, "no book is shitty! All human experiences are worth putting to paper!"
You're right! But, also, Counterpoint:

I went to my local thrift shop and got these for the low price of $5 for all 10. ("Getting into politics?" The lovely ladies behind the counter asked me. "In a manner of speaking," I replied.)
Once I got home, it was easy to turn them into this, their component parts:

("Please stop saying you're skinning them," my partner begged. Too late!)
[EDIT TO ADD: Here's a guide! Also on my tumblr. Also - when thrifting, bring a piece of paper folded or cut into the minimum size you need for boards: this way you can make sure you're getting big enough material!]
While these are just book boards, diligent deconstruction can even yield headbands, I'm pretty sure - I'll report back on my next trial run. [EDIT TO ADD: yup, you can!]
I cannot overstate the delight I have in giving these covers new life for binding fanfiction, particularly the queer kind.
Happy binding!

First time using a French link stitch to sew the signatures together. I really like how secure it makes it all feel, especially since I didn't use tapes.
I used Sealemon's tutorial:
I didn't think to do this until after I'd punched the holes, otherwise I would have spaced them out more.
Hopefully I can get this glued together tonight, but as you can sort of see on my table, I'm working on a (garment) sewing project right now that's pretty thorny, so I may not get to it. It's okay. I'm happy as long as I'm making something.


bookbinding project updates! i’ve secured some decorative papers for endsheets and covers, and they’re all sooo pretty. i may have gone a little overboard, but that simply means i have room for trial and error.
additionally—i managed to get my hands on quite a few educational resources from the library, and the best book i found was “Introduction to Bookbinding & Custom Cases: A Project Approach to Learning Traditional Methods” by Cindy and Tom Hollander. great explanations, clear pictures, instructions on how to mcgyver quite a few tools—and the best thing is that none of the projects require a sewing frame. if you’re looking for a good step by step beginner’s guide, that’s where you should go!
anyway! back to typesetting (:
Bookbinding resources masterpost!

Although I've only made one casebound so far, I've recieved multiple requests to make a tutorial. And well, I'm not that good. But I can share some of the online resources that have helped me.
• Youtube
DAS bookbinding - lots of bookmaking methods, explained in detail.
Annesi Bindings - mostly casebinding, and other useful things.
Dan Siebel's kettle stitch tutorial -short video on how to do a kettle stitch. Filmed up-close.
• Tumblr
Renegade Publishing - a group of independent fanbinders. They have a discord (though it's 18+) and answer binding related questions on the blog.
Armoredsuperheavy - founder of renegade publishing. Maintains multiple docs about the full process of making a book.
Hedgehog-moss's post about bookbinding - beginner information, links to resources
r/bookbinding - a large community of people. You can share your progress, ask questions. You may get criticism though. Expect brutal honesty.
•Other
Alternative bookbinding supplies - We don't all have the correct supplies lying around. It's fine.
How to: Headbands - article about sewing headbands.
Don't forget to use acid free materials! Acidic paper/glue decays with time, causing your book to turn yellow and fall apart. PVA and weath paste are commonly used adhesives.

I will update this as I find more sources! I'm still learning.
The Fine Art of Book Butchery Deconstruction

What you need: bad book, a utility knife/box cutter. That's it!
A full guide below!
Strip the book!

Once it's naked, take a look! I've marked where the bookboard is attached to the spine. This is where you cut!


Do both sides and voila! Boards!

You can trim these to fit whatever size you need later - for now, set them aside! We're gonna get the headbands!

Delectable...hidden...Not for long!

You can very easily peel the spine back as seen here - and then you can peel the headband off.
Sometimes the glue makes it a bit tricky (as seen here) - just use your utiliknife!


Do both sides... and that's it!

With the remaining text block, it varies on if your city can recycle it. However, it's also good for paper mache! Pulp! Blackout poetry! Discard paper! Compost! Anything you'd like to do - have fun!
As you've asked for asks!:
Do you have any quick-and-dirty book/fic binding methods a terrified-of-failure novice could use to bang something out to get over the first collywobbling step of Actually Doing The Thing? (this may be something I've been meaning to ask for ages)
yes! I absolutely do! in my opinion the best quick-and-dirty bookbinding method is a no-glue pamphlet: you don't have to mess with glue or measuring or cutting anything, all you need is your text, some paper, a needle and thread. you can use the same needle to punch holes if you don't have an awl.
this is going to be a little long but that's because I'm going to write out some fairly detailed instructions for an A5 sized pamphlet. If you don't want detailed instructions and think you can glean the necessary info from photos, just skip to the photos! I've also linked tutorials.
for preparing the text to printing, in whatever software you use (word, libreoffice, gdocs, whatever) make sure your document is set to page size A5. make it look readable. then save as/export that document as a straight-paged PDF. now go to the bookbinder JS tool (https://momijizukamori.github.io/bookbinder-js/), and upload the PDF. source manipulation: none printer paper size: A4 display unit (you can ignore, or choose cm if it gives you anxiety that it automatically displays points) printer type: select single-sided or duplex accordingly* rotate paper: ignore flip on long side: check if you are printing duplex and if your duplex printer flips the paper on the long side page layout: tick folio page scaling: original page positioning: centered ignore the rest flyfleaf: ignore signature format tick: standard signatures. in the length drop down, this depends on the type of pamphlet you are doing. for folio i generally find 4-5 pages per signature a comfortable thickness. if you have 6 whole A4 pages you can still do that as a single signature or you can split it into two signatures 3 pages each. wacky small layouts: ignore this signature info click the generate preview button to see what your PDF looks like imposed! I love this step especially when I'm doing quarto (A6) or octavo (A7) sized books generate output - click this to generate an imposed PDF
for A6 and A7 sized books the instructions are much the same, except for these you make sure the page size is A6 or A7 in your software, and then you choose quarto or octavo instead of folio. for signature length drop down I keep signature length to 1 for octavos typically and 2 for quartos, as this still refers to sheets of paper, and for octavo 1 sheet of A4 paper will turn into 4 smaller sheets in one signature once folded and cut.
*if you don't have a duplex printer you will have to manually turn the paper to print on the other side. I cannot be arsed with this so I bought a printer capable of duplex printing (I didn't have a printer anyway). if you already have a printer check what it can do as you might be surprised and go from there.
now to the pamphlets! you don't need a cover - I have one for the long stitch pamphlet but for the saddle stitch one I didn't bother and just made sure the first page had a title on it. you can always take a different piece of paper and print a cover on or or just use coloured cardstock and create a simple cover, but a cover is not necessary unless you're doing a long stitch pamphlet. all you need to do is to punch holes and start sewing. there are a few different stitch types below, I wouldn't say any of them are more difficult or easier than others, but they do look different so...pick one you like the look of and go from there?

pamphlet stitch (uneven number of holes) I haven't ever done a pamphlet stitch but here's a tutorial for how to do it: https://www.starpointestudio.com/simple-pamphlet-stitch-book-step-by-step/
saddle stitch (uneven number of holes) I realised that what I was thinking of as a pamphlet stitch is actually saddle stitch, as in this A7 pamphlet:

here's a tutorial for how to sew saddle stitch: https://www.bookbindingworkshopsg.com/saddle-stitch-bookbinding-tutorial/ here's a video tutorial: https://www.youtube.com/watch?v=aWHkY5jOoqM (sealemon has a lot of bookbinding tutorials and I know many people who like her videos, I used her tutorial for coptic binding way back when I first made a book but I can't otherwise vouch for the quality as I haven't used her videos)
french link stitch (even number of holes) in this one I used french link stitch which I typically use for thicker textblocks that i'm not planning to use tapes with as the french link gives it some robustness, I used it here because I had never done it before and wanted to try it out. I am planning to take these stitches out and re-sew this pamphlet with a cover now that I've found a suitable piece of transformer fanart to use as a cover:

french link tutorial. it's quite long but it has a colour coded bit towards the end that shows how the thread is supposed to link which i find very helpful to visualise: https://www.handmadebooksandjournals.com/bindings/french-link-stitch-binding/
here's a video tutoral from DAS bookbinding (he is my go to for techniques and he has the most soothing Australian accent as well, though fair warning not all of his videos are for beginners): https://www.youtube.com/watch?v=O4ZPdbaM-Ws
long stitch (even number of holes) for this one I used long stitch and I had a cover. this one is my favourite variation because I can make these pretty and simple covers and the stitch looks nice on the outside as well, so this one scratches the 'i want to make a book' itch for me.


here's a tutorial that also includes a how to on a cover that is different from my cover: https://lccprintmaking.myblog.arts.ac.uk/files/2020/06/Long-Stitch-Tutorial-A4.pdf DAS also has a video tutorial for long stitch but it's like three videos long, maybe watch it later :'D here's one I haven't watched but seems decent: https://www.youtube.com/watch?v=XnignTL_wDQ
you can use saddle stitch for this kind of pamphlet as well, that's what I did for dozens of ships and hundreds of souls (https://ashmouthbooks.tumblr.com/post/681587080267202560).
I hope this helped!!
so, you wanted to start bookbinding?
so @princetofbone mentioned on my post for "factory settings" about wanting to know more about the binding style that i used for it. so i thought i might make a post about it.
i was as terrible as i always am for taking in progress shots, but i can link you to the resources i used in order to make my book. i would also like to point out that "factory settings" is my 120th bind, and i have been doing bookbinding as a hobby for just over 3 years now. unfortunately this means some of the methods that i used for that bind aren't particularly beginner friendly, just in terms of the tools and methods i have used, but i would love to point you in the right direction when it comes to resources. i dont say this to sound pretentious which i fear i might come across, just so that youre fully informed. getting into this hobby is fun and rewarding, but it can definitely be intimidating.
with that caveat, heres a list of links and resources that i have used for bookbinding in general, with additional links to methods i used specifically in regards to this bind.
ASH's how to make a book document. it gives you a great introduction into typesetting fics (where you format the text of fics to look like a traditionally published books) and then turning them into a case-bound book (the style i used for "factory settings"). it is comprehensive, and explains how to use microsoft word to do your bidding. it was invaluable to me when i was just starting out! currently i use affinity publisher to typeset/format my fics for printing, but i only bought and learned how to use that after i had been binding books for a year and a half. i made some beautiful typesets with word, and some of my close friends use it still and design stuff that i never would be able to in my wildest dreams (basically anything by @no-name-publishing)
DAS Bookbinding's Square Back Bradel Binding. a great style to do your first bind in! this method requires, when making the case, to attach the cover board and the spine board to a connecting piece of paper, which makes it so much easier to match the size of the case to the size of the text block (your printed out and sewn fic). using this method is what allowed me to get much more accurately fitting cases, and made me much more confident with the construction of the books i was making. a well-made book is something that is so wonderful to hold in your hands!
DAS Bookbinding's Rounded and Backed Cased Book. This is the specific method that i used to create my bind for "factory settings"! even before i could back my books, i found that watching DAS's videos in particular helped me see how books were traditionally made, and i was able to see different tips and tricks about how to make nicer books.
Book Edge Trimming Without... i trim the edges of my text block using my finishing press and a chisel i have sharpened using a whetstone and leather strop with buffing compound on it. i follow the method for trimming shown in this video!
Made Endpapers. i follow this method for my endpapers, as i used handmade lokta endpapers, and they can be quite thin, but they look beautiful! i used "tipped on" endpapers (where you have your endpaper and then put a thin strip of glue on the edge and attach it to your text block) i used for a very long time before this, but these feel like they are much more stable, as they are sewn with your text block.
Edge Sprinkling. this is the method that i used for decorating the edges of my text block. but the principle is basically clamping your text block tight and then sprinkling the edges. i do not believe you need to trim the edges in order to do sprinkles on the edges, and that's what makes it accessible! i personally just use really cheap acrylic paint that i water down and then flick it onto the edges with my thumb and a paint brush.
Double-Core Endbands. i sew my own endbands, which i followed this tutorial for. that being said, it's kind of confusing, and this video is a bit easier to follow, but it is a slightly different type of endband.
Case decoration. i used my silhouette cameo 4 to cut out my design for "factory settings" in htv (heat transfer vinyl). i also used my cameo 4 to cut out the oval of marbled paper on the front, as i honestly didn't want to try my hand at cutting an oval lol. i also glued some 300 gsm card with an oval cut out of the centre of it onto the cover before covering it with bookcloth, to get a kind of recess on the cover. i then glued the oval of marbled paper onto the top of the recessed area once it was covered with bookcloth, so that it was protected. the images i used were sourced from a mix of rawpixel, canva and pixabay. a more accessible way to get into cover decoration is by painting on a design for your cover as described in @a-gay-old-time's tutorial just here. or even doing paper labels, which look classy imo.
physical materials. sourcing these will depend on your country. i am located in australia, and have compiled a list with some other aussie bookbinders of places to buy from. here is a great post describing beginning materials for getting started binding.
@renegadepublishing. this tumblr is great! its what got me started bookbinding, and being in the discord has been inspiring, motivating, and honestly just one of the best online experiences i have ever had. it is full of resources, and most people in there are amateur bookbinders, with a couple of professionals thrown in. the discord is 18+, and anyone can join!
i'm sorry this post got so long, but i hope that this has a lot of information for you if you would like to get started bookbinding. its one of the best hobbies ive ever had, and i genuinely believe i will have it for the rest of my life.
Songs of Love and Death ♥️☠️🗡️
Edited by George R. R. Martin & Gardner Dozois
Features stories by Neil Gaiman, Jim Butcher, Jacqueline Carey, Diana Gabaldon, Majorie M. Liu, Carrie Vaughn, and many more.
My first process video - PART 1
Here is PART 2 on Instagram
Here is PART 2 on tumblr
📚📖
This is my most ambitious rebind so far. I’ve printed on bookcloth before, but this time it was particularly challenging. I printed a much larger pattern for the covers and spine than I’d ever previously attempted. I ran into some issues with printer jamming for the first time since I started the regular practice of printing directly onto bookcloth. It was immensely stressful, because any damage to the printer as a result would have voided the warranty, since book cloth is not one of the accepted printing mediums for the machine.
But with some patience and realignment, I managed and the cloth printed successfully. But the next problem I ran into was smearing. I’d never had this problem before either. I had changed up my settings out of caution for the machine’s acceptance of the cloth, but the result was probably a heavier and denser layering of ink than usual. This is becuase the machine believed it was printing onto matte brochure paper, not regular paper.
So as I was making the case, the design was smearing heavily on my fingers. I had to be extremely careful where I touched the book to make sure I wasn’t destroying the design as I wrapped the cover boards and spine, but it was still an absolute mess.
In the end though, I got through it. I’m pretty pleased with the overall design. I’ve been told by some that the pattern reminds them of azulejo ceramic tiles, or delftware porcelain. Hopefully my gift recipient likes it as well.
My original cover designs can be seen HERE.
sometimes binding public domain works is fanbinding the same way that some original works belong on ao3 because they're fanfiction. hope that helps
Do you have any recommendations on how to learn bookbinding? It looks super cool, but I don't know where to start.
It depends on the type of bookbinding you want to get into, my focus is primarily on hardcover case bound books, so if that is what you are keen on, here are some resources that I found incredibly useful while learning:
YouTube
DAS bookbinding has a whole bunch of really detailed, professional tutorials that are incredibly useful. He covers multiple types of binds and techniques and they are all very easy to follow. (I always laugh when I watch his videos tho because he’s Aussie like me and he has the EXACT same shitty tiles in his workroom that I have in my house.)
Sea Lemon does bookbinding amongst other crafts, and while her videos are shorter and less in depth, they are very friendly for beginners and offer alternatives if you don’t have all the tools/equipment at home
Omgreylo is great for if you are doing fanbinding, she also has videos on typesetting, which is something you’ll want to learn too if you are planning on fanbinding. Her videos are also very chill and sometimes I’ll just watch them to relax because I’m a nerd.
Ingenious Designs has some really good videos on some more advanced skills like edge gilding and working with leather bound books. He’s also really charismatic so his videos are fun and informative.
I’m probably forgetting a few, but those channels have all been super useful. The other thing that I do and highly recommend is just browsing the bookbinding and fanbinding tags on tumblr, reddit and instagram to see what other people are doing. A lot of people (including myself when I finally remember to actually take pictures and record the process) will post progress photos alongside the finished project and will talk about the process. Most people are quite happy to answer any questions you might have about their projects too so don’t be afraid to ask.
Also the most important piece of advice I can give, if you are serious about bookbinding, GET YOURSELF SOME SHORT-GRAIN PAPER. It makes all the difference in terms of quality, ease of use, and durability.
Anyways if anyone else has any other resources or tips they think are useful, please feel free to add!


ANBU LEGACY 5.1 - @anbu-legacy
With kind permission of the authors
Full cloth binding with title hot stamped on the spine.
case materials 2,4 binders board and cardboard (covers) coated book cloth, black (covering material) silver heat reactive foil (hot stamped title)
inner book Munken polar, 100gsm (book body paper) Chiyogami paper (endpapers)
Format: ~A6 (10,5cm x 14,8cm)
Listen to your elders
So last week I posted abut the importance of downloading your fic. And then three days later AO3 went down for 24 hours. No one was more weirded out by this than I was. But while y’all were acting like the library at Alexandria was on fire I was reading my download fic and editing chapter eight of Buck, Rogers, and the 21st Century. And also thinking about what I could do to be helpful when the crisis was actually over.
So first off, I’m going to repeat that if you’re going to bookmark a fic, you really need to also download the fic and back it up in a safe place. I just do it automatically now and it’s a good habit to get into.
But let’s talk about some other scenarios. Last October I lost power for over a week after hurricane Ian. Apart from not having internet or A/C I did find plenty to do, I collect books so I had plenty to read, but maybe, unlike me, your favorite comfort reads aren’t sitting on a bookshelf. So let’s do something about that, shall we?
In olden times many long years ago around 1995 we printed off a lot of fic. It was mostly SOP to print a fic you planned to reread and stick it in a three ring binder. And that’s totally valid today too, but you can also make a very nice paperback with a minimum amount of skill and materials.
Let’s start with the download; Go to Ao3 and select your fic, we’ll be working with one of mine. This method works best with one shots, long fic tends to need a more complicated approach. Get yourself an HTML download

Open up the HTML download and select all then copy paste into any word processor. Set the page to landscape and two columns, then change the font to something you find easy to read, this is your book, no judgement. This is all you have to do for layout but I like to play a little bit. I move all the meta, summary, notes to the end and pick out a fun font for the title:

No time like the present to do a quick proofread. Congratulations, you’ve just created your first typeset. On to the fun part.
Now you’re going to need some materials: 8.5x11in paper ruler one sheet of 12x12 medium card stock (60-80lb) scissors pencil pen or fine tip marker sheet of wax paper white glue two binder clips 2 heavy books or 1 brick butter knife
You’ll also need a printer, if you’re in the US there is almost a 100% chance your local library has a printer you can use if you don’t have your own. None of these materials are expensive and you can literally use cheap copy paper and Elmers glue.
Print your text block, one page per side. Fold the first page in half so that the blank side is inside and the printed side out:

use the butter knife to crease the edge. Repeat on all the sheets. When you’ve finished, stack them up with the raw edge on the left and the folded edge on the right. I used standard copy paper, because you’re only printing on one side there’s no bleed to worry about. Take the text block and line everything up. Use the binder clips to hold the raw edge in place.
Wrap the text block in the wax paper so that the raw edge and binder clips are facing out. I’m going to use my home built book press but you don’t need one, a brick or a couple of books or anything else heavy will work fine.

Once the text block is anchored down, take off he binder clips and get out the glue.

You can use a brush but you don’t need one, smear some glue on that raw edge.
Go make a margarita, watch The Mandalorian, call your mother. Don’t come back for at least an hour
In an hour smear some more glue on there and shift your brick forward so that the whole book is covered. This keeps the paper from warping. While glue part 2 is drying we’ll do the cover. Get out your 12x12 cardstock

Mark the cardstock off at 8.5 inches and cut it. Measure in 5.5 inches from the left and put in a score line with the butter knife (the back edge not the sharp edge)
Carefully fold the score line, this is your front cover. You have some options for the cover title, you can use a cutting machine like a cricut if you have one, you can print out a title on the computer and use carbon paper to transfer the text to the cardstock. I was in a mood so I just freehanded that beoch. Pencil first then in pen.
Take your text block out from under your brick. Line it up against the score mark and mark the second score on the other side of the spine

Fold the score and glue the textblock into the cover at the spine. Once the glue dries up mark the back cover with the pencil and then trim the back cover to fit with your scissors.
Voila:


I’m going to put this baby on the shelf next to the Silmarillion.
The whole process, not counting drying time, took less than an hour.
If you want to make a book of a longer fic, I recommend Renegade Publishing, they have a ton of resources for fan-binders.
Bookbinding for Beginners by a Beginner
All of the stuff I've written thus far. [October 28th 2023]
Part One
Part Two
Part Three
Part Four
Part Five
Part Five and A Half
Part Six [Added October 31st 2023]
Trouble Shooting Aside [Added November 11th 2023]
Part Seven [Added November 16th 2023]
Part Eight- and Final Post (Until I ultimately write more, cause lets face it, I've already started tweaking how I do things) [Added November 29th 2023]
Do you have any recommendations on how to learn bookbinding? It looks super cool, but I don't know where to start.
It depends on the type of bookbinding you want to get into, my focus is primarily on hardcover case bound books, so if that is what you are keen on, here are some resources that I found incredibly useful while learning:
YouTube
DAS bookbinding has a whole bunch of really detailed, professional tutorials that are incredibly useful. He covers multiple types of binds and techniques and they are all very easy to follow. (I always laugh when I watch his videos tho because he’s Aussie like me and he has the EXACT same shitty tiles in his workroom that I have in my house.)
Sea Lemon does bookbinding amongst other crafts, and while her videos are shorter and less in depth, they are very friendly for beginners and offer alternatives if you don’t have all the tools/equipment at home
Omgreylo is great for if you are doing fanbinding, she also has videos on typesetting, which is something you’ll want to learn too if you are planning on fanbinding. Her videos are also very chill and sometimes I’ll just watch them to relax because I’m a nerd.
Ingenious Designs has some really good videos on some more advanced skills like edge gilding and working with leather bound books. He’s also really charismatic so his videos are fun and informative.
I’m probably forgetting a few, but those channels have all been super useful. The other thing that I do and highly recommend is just browsing the bookbinding and fanbinding tags on tumblr, reddit and instagram to see what other people are doing. A lot of people (including myself when I finally remember to actually take pictures and record the process) will post progress photos alongside the finished project and will talk about the process. Most people are quite happy to answer any questions you might have about their projects too so don’t be afraid to ask.
Also the most important piece of advice I can give, if you are serious about bookbinding, GET YOURSELF SOME SHORT-GRAIN PAPER. It makes all the difference in terms of quality, ease of use, and durability.
Anyways if anyone else has any other resources or tips they think are useful, please feel free to add!
Guess who just completed their first Linked Universe Bookbinding project! 💙


Made myself an anthology of all my favourite Wild-centric fics that were just too short to be a book on their own.
I wanted to model the cover off the Champion's Tunic so I ended up finding this gorgeous bright blue bookcloth and decorated it with white HTV, then found some blue and white headbands to match (not quite ready to try making my own just yet).
I hope people like this because I've got a big Linked Universe Bookbinding project I plan to announce soon, so stay tuned for that!
(Also please don't ask what fics I included, I feel guilty because I wasn't able to make authors copies and I don't want anyone to feel disappointed)
GIA THAT BOOK IS SO PRETTY AND I HAVE SEVERAL QUESTIONS
Did you print it yourself? The paper quality is so pretty!!
Had you ever done something like this before? How long were you working on this?
Did you draw or write anything yourself for this? Or include any art?
How did you choose the order of the pieces? Did you organize them in any way? That looks like a lot of fics! Probably!
THAT IS VERY PRETTY AND COOL AND IMPRESSIVE AND HAS SO MUCH LOVE POURED INTO IT
SORRY FOR ALL THE SCREAMING IT SEEMS APPROPRIATE
Hello friend! I don't mind the screaming at all, it shows your enthusiasm which I absolutely love!
Did I print it myself?:
Yes I did! I took the text from AO3 and then typeset it into a more suitable book format in Word. It's printed on 90gsm archival short grain paper so it feels like the paper you'd find in a limited edition/deluxe version of a book. Very nice and smooth!
Have I done something like this before/How long did it take?:
I've made a few books before but all of them have either been practice books or gifts for others. This is the first one I've made for myself! This particular book took several evenings to typeset, but once that was done, printing, sewing, gluing making the cover, applying the cover design etc took about a day and a half? Which isn't too bad but I was doing it in 43°C/110°F weather so it was a little taxing...
Did I draw or write anything for myself:
No, not this time! This was all just a collection of my favourite fics that others have written. Though keep an eye on some of the future projects I have planned! 😉
How did I organise the fics?:
There are 11 fics in total in this book, ranging anywhere from just over 1k words to about 30k. I put 7 shorter one shot fics at the front of the book, and then the 4 longer, multi-chapter fics towards the back, but other than that there wasn't much rhyme or reason to the order.
I'm really glad you like it! I've got some more projects that I will reveal soon, so keep an eye out for those too! 💙
What method do you use for sewing the pages together? Also what's your process for making the covers (fucking gorgeous btw holy shit I'm in awe)?
Hello friend!
Depending on the size of the book, I'll use a simple kettle stitch for thinner books, and a French link stitch alongside linen tape for extra support when binding heavier books. Hot tip, used waxed thread to prevent tangles and to help prevent tears in your paper!
For the cover, I'm assuming you mean the design, which is Heat Transfer Vinyl that is cut with a Cricut and ironed on. For this particular project, I was using Siser Easyweed in white. My biggest tip for making the cover I can give is to apply the designs BEFORE you glue the text block in, because if you make a mistake, worst case scenario is you just gotta redo the cover. If it's glued in however, it is much, much harder to fix, and worst case scenario is you have to start the entire project from scratch.
I hope that helps! I'm always happy to answer questions if you have any more!

As promised! I wrote about the illegal fanbinding that's led to writers deleting their works recently, how that connects to the current pull-to-publish wave, and what happens when the rapidly expanding sphere of fic readers starts to get disconnected from *fandom*:
The ever-increasing reach of fanfiction has inched the practice away from text-written-in-community to a more traditional author-reader relationship—and the context collapse that’s come with viral works being treated like any other romance novel has spurred clashes between different types of readers with different sets of expectations. In the past few years, fic authors across all corners of fandom have increasingly complained about shifting attitudes from readers who treat them like any other content creator, demanding the next chapter as you might demand your favorite influencer’s next video. But unlike on creative platforms like TikTok and YouTube, the fic writer doesn’t get revenue from their new installment.
We'll also talk about this in some capacity on the next episode of @fansplaining! (In contrast with today's episode, on the non-monetized, gift-economy practices of many fanbinders, whose hobby is also imperiled by the people selling and buying fic.)