Diy Or Die - Tumblr Posts
Need to buy more white thread,
Cabbage has my full support! Way to raise the next generation and be a great uncle at the same time! You're sick!!!
Y’all, my little nephew, who’s nickname is “Cabbage,” wanted a “punk jacket,” like Uncle Kade’s. (EMPHASIS ON LITTLE, be nice)
So, I asked him what kind of patches he wanted on it, and this is what we came up with. Just need to sew the patches down and line the vest. I can’t wait to finish it and send it to him.


✨ Get ready to shine with Mooco the Cow! Watch how easy and fun it is to bring our favorite cow to life with sparkly sticker magic! 🐮🌟 With over 300 glittery dots, you’ll have Mooco sparkling in no time. Stick, shine, and show him off on your fave surface! Let’s get moovin’ on this sticker masterpiece! ✨💫
I wanna make some anime patches for animes I think are just a bit punk for my crust pants but I can’t pick one for neon genesis (ima do “see you space cowboy” for cowboy bebop)
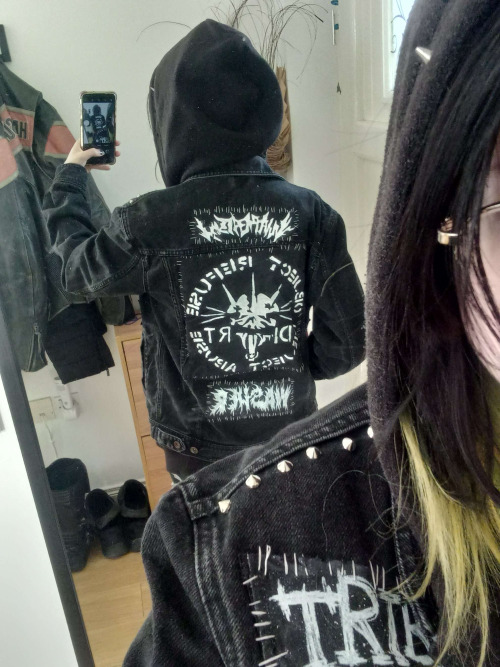
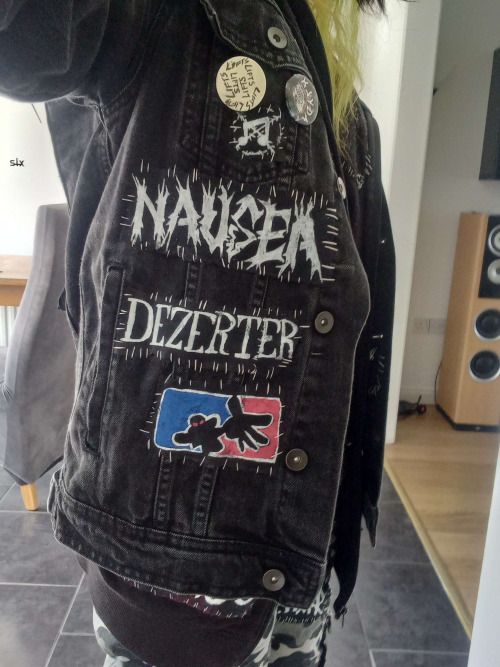
jacket is done !! u cant rlly see it but the tribe 8 and boot licker patches r under the hood + homomilita on the bottom side


hey punkz here's a tut for wrist cuffs/bracelets since some of u are new 2 tha scene


written out 4 ease of access
HOW TO: WRIST CUFFS DIY
Step 1: Old Jeans Waistband
- Cut off waistband from rest of pants
Step 2: Cut to Wrist Size (X2)
- measure around your wrist and cut
Step 3: Add Closure
-button + buttonhole or safety pin + soda tab works best imo
- Sew down soda tab to one side, safety pin to other
Step 4: Add Hardware
- good options are spikes, more safety pins, more soda tabs, staples, chains, and whatever else you can find
Step 5: SHOW OFF!!!!
feel free 2 add any other tits on this thread or tag #punk tutorials

How I make a record necklace
I have a record necklace I am very fond of so I thought I would give yall a tutorial
What you will need:
Washer
Nail polish or paint
Chain Necklace (make sure it is thin enough to fit through the center of the washer
Jump rings
Pliers are recommended but not required
First: paint the washer on both sides to look like a record. You can do both sides a different color if you want.

I recommend putting clear nail polish or any sealant over it to reduce paint chipping.
Second: split your chain in half and feed one side through the hole.

Third: put a jump ring on the end of the chain and put it through the top of the chain, leaving a slip chain.

It should look like this. Do this with both sides and you have a necklace :} it is easily reversible if you wish.
I customized my converse a little while back and I'm pretty happy with them


I used white fabric paint for the eyes and painted the grommets with black nail polish. The stitching was colored in with a sharpie which has held up better than i thought. I had to stitch the rubber back onto the canvas on the right one.
![[IMAGE ID] a screenshot from the splatoon 3 side order dlc of pearl on the left with her hands up and talking, acht standing in the middle with their arms crossed and marina looking at pearl concerned and focused on what she's saying [END ID]](https://64.media.tumblr.com/a75f074832052970e5d20776eb30ee00/21bf56b291989780-77/s500x750/1185d1ca1dd257d9a45902c45506e3a4c7523747.png)
# spiral / three / x osdd cripple punk system splatoon & nintento hyperfixated irl octoling ✡︎ we switch between using we / i / 3rd person prns
terfs & swerfs get off our turf. dni endo "systems" & narc abuse believers. we block freely. use tone tags on us always open to education. we're new to this community and slow thinking because of disassociation so please be careful with me


[IMAGE ID] splatoon divider with squids decorated across. they are bounding slightly and in the pattern of (left to right) pink, green, orange, blue, cyan and purple. the colours are vibrant and neon
underneath are 8 pixel art style blinkies reading: "chronic fatigue" in green text with sleepy z's, "lgbt & disabled" in rainbow text, "giant isopod" in lavender with a giant ispod and a tiny heart, "xeno gender (image of a small heart) bitch" in blue and pink text, "use simple words" in an ombre of pink to purple with a small heart on the end, text switching between "disabled is" and "not a bad word" in orange and purple text, "cluster b hottie" in purple text and a lavender b and a small purple heart on the end and fight ableism in vibrant red with crosses on wither side [END ID]
![[ID] An Idea For The Jewish Anarchy Symbol. The Symbol Is The Star Of David In A Circle With An A In](https://64.media.tumblr.com/10ed24ad0146d5915e90b487ac6e24ea/0c2d06378ffb68a7-7f/s250x400/41d0a950d26fd1ff30b7fb046811d7c620618633.png)
![[ID] An Idea For The Jewish Anarchy Symbol. The Symbol Is The Star Of David In A Circle With An A In](https://64.media.tumblr.com/5957e2f2c6d5db2271d52cd4490543b4/0c2d06378ffb68a7-b6/s500x750/254822d59911d4fa283cb74eaa17350918a6204e.jpg)
![[ID] An Idea For The Jewish Anarchy Symbol. The Symbol Is The Star Of David In A Circle With An A In](https://64.media.tumblr.com/b6f1df9e1450b41c01fd0a4e59840399/0c2d06378ffb68a7-1e/s250x400/ecd4a01465314278f0903a7ff96d881b642c4e0d.png)
[ID] an idea for the jewish anarchy symbol. the symbol is the star of david in a circle with an A in the middle. the first image is a digital version of symbol on a white background, the second is it on a pin i made zoomed in on and being held in my hand and the third is the same as the first but with an image mask over it to look like a button/pin [END ID]
fellow jewish punks what do we think of my idea for a jewish anarchy symbol? came up with it last night when messing around with beer bottle pin making and i think it looks pretty neat
design isn't final so if you have any cooler ideas Imk! i think it could work with just the anarchy symbol in the middle without the circle around the star too but my sharpie was bleeding too much for it to look good on my pin Imao
tag me if you use it in any crafts i'd fucking LOVE to see this be a thing
![[ID] Denim Sweat Pants Layed On A Carpet Floor. There's A Variety Of Political, Band And Fandom Patches](https://64.media.tumblr.com/35908aa1ac3ff484a16bff4576115f01/6c3064df0faed6da-aa/s500x750/2b5990e0e80b32453432583b5faa5a651d20307b.jpg)
[ID] denim sweat pants layed on a carpet floor. there's a variety of political, band and fandom patches sewn on with floss. some stitching are in the classic punk style while others are in other experimental styles. most patches are homemade from black fabric while two are store bought. there are also safety pins attached in empty space [END ID]
crust pants progress. there's sm patches i have ideas for but i'm just so hyperfixated on games i forget sighh. feel free to take inspo!
Had a few folks interested in how I made the patches I posted for Solarpunk Aesthetic Week, so I thought I'd give y'all my step-by-step process for making hand-embroidered patches!

First, choose your fabric and draw on your design. You can use basically any fabric for this - for this project I'm using some felt I've had lying around in my stash for ages.

Next, choose your embroidery floss. For my patches I split my embroidery floss into two threads with 3 strands each, as pictured. You can use as many strands in your thread as you prefer, but for the main body of my patches I prefer 3 strands.
Next you're going to start filling your design using a back stitch.

First, put in a single stitch where you want your row to start.

Poke your needle up through the fabric 1 stitch-length away from your first stitch.

Poke your needle back down the same hole your last stitch went into so they line up end-to-end.
Repeat until you have a row of your desired length (usually the length of that colour section from one end to the other). Once you have your first row, you're going to do your next row slightly offset from your first row so that your stitches lay together in a brick pattern like this:

Make sure your rows of stitches are tight together, or you'll get gaps where the fabric shows through.
Rinse and repeat with rows of back stitch to fill in your patch design.

When you're almost to the end of your thread, poke your needle through to the back of the fabric and pull the thread under the back part of the stitching to tuck in the end. Don't worry if it looks messy - no one's gonna see the back anyway.
This next step is fully optional, but I think it makes the patch design really pop. Once your patch is filled in, you can use black embroidery floss to outline your design (or whatever colour you want to outline with - it's your patch, do what you want). I use the full thread (6 strands, not split) of embroidery floss to make a thicker outline.

I use the same back stitch I used to fill the piece to make an outline that adds some separation and detail. You could use most any 'outlining' stitch for this, but I just use back stitch because it's just easier for me to do.
Once you're finished embroidering your patch, it's time to cut it out!

Make sure to leave a little border around the edge to use for sewing your patch on your jacket/bag/blanket/whatever, and be careful not to accidentally cut through the stitches on the back of the patch.
If you have a sturdy enough fabric that isn't going to fray, you can just leave it like this. If not, I recommend using a whip stitch/satin stitch to seal in the exposed edges (I find that splitting your embroidery floss into 3-strand threads works best for this).

And then you're done! At this point you can put on iron-on backing if you want, or just sew it on whatever you wanna put it on. Making patches this way does take a long time, but I feel that the results are worth it.
Thanks for reading this tutorial! I hope it was helpful. If anyone makes patches using this method, I'd love to see them! 😁