I Wanted To Keep All My Power Cells Interchangeable, So I Had To Match The Magnets To My Existing Power


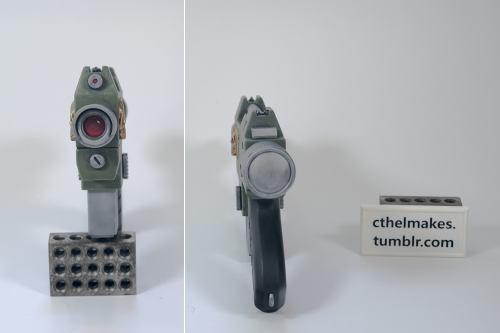
I wanted to keep all my power cells interchangeable, so I had to match the magnets to my existing power cells. This was pretty easy - put the magnets on the existing power cell, then mark the top with sharpie


Then it was just a matter of supergluing the magnets in place with the sharpie mark facing up. Finally, I wiped off the sharpie with a kitchen towel and some IPA.

I then used the power cell to position the magnets in the magazine well - I sprayed it with superglue accelerator first, so the magnets glued almost instantly.
All that's left now is the weathering!
-
 notlooking23 liked this · 3 years ago
 -
 bbzzee98 liked this · 3 years ago
 -
 frogshunnedshadows liked this · 3 years ago
 -
 ottopro liked this · 3 years ago
 -
 doctorpigmd reblogged this · 3 years ago
 -
doctorpigmd liked this · 3 years ago
-
 famous2000 liked this · 3 years ago
 -
 theforbiddenfish liked this · 3 years ago
 -
 aliquid-de-magis liked this · 3 years ago
 -
 praetorianxxiv liked this · 3 years ago
 -
 thecasualmaker reblogged this · 3 years ago
 -
thecasualmaker liked this · 3 years ago
-
 cthelmax reblogged this · 3 years ago
More Posts from Cthelmax

40k-ed up some old firearms


All finished!
If you want to make your own, the .STL files are available for sale HERE

All the details got a coat of gloss black primer with a paintbrush to cover up any green. Even the handle, which I meant to use matte black on 🙃


The gold skull and wing got an undercoat of copper, followed by a topcoat of gold


The other metal details got a coat of gunmetal, followed by a drybrush with steel. This is the point I realised if I hadn't glued all the details on I could have done this a lot easier with an airbrush 🤦♂️

The little radiator fins got a coat of black metallic paint, then a drybrush with gunmetal.

Fire selection indicators get a coat of red paint


rear sight - two white dots; front sight - one red dot (there are little dimples in the sculpt)


The muzzle lens was painted by hand with a simple gem highlighting scheme. Finally, the power indicator was handpainted with a couple of bits of masking tape to keep the borders clean.
Painting is now complete!

Once the painting was finished, everything got a coat of satin varnish to seal it before weathering. OR THAT WAS THE PLAN
Spoiler: It turns out I didn't use enough varnish...

...so when I tried to wipe away the excess oil paint I was using for weathering, I ended up taking the varnish off as well 🙃 In some places, when I used IPA I ended up taking the paint off down to the primer 🤦♂️🙃🤦♂️
By being gentle with the q-tips and kitchen towel (and some careful reapplication of paint where needed), I was able to get it to a presentable, if rather heavily engrimed, state. Before anything else went wrong, I gave the whole thing a much heavier coat of varnish and called it a day